Document Getting started with Nilead Ecommerce Product

Getting started with Nilead Ecommerce Product

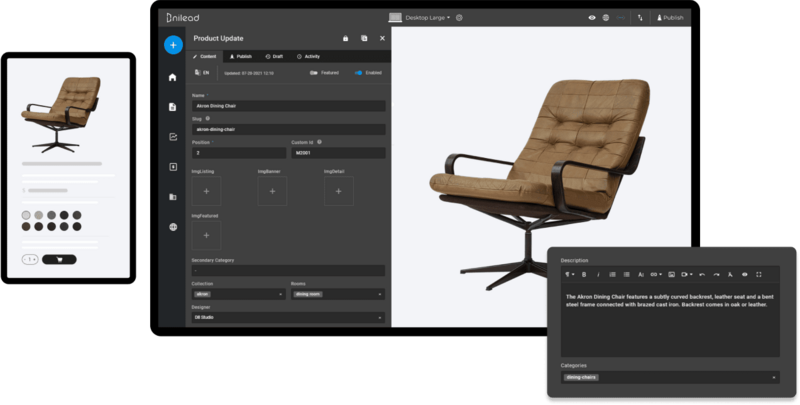
Step-by-step tutorial to create your first product in Nilead Ecommerce, with support for variants, stock, and advanced attributes.

Table of content

TL;DR / Overview

This tutorial teaches you how to create and configure products in the Nilead Ecommerce system — from basic info to advanced variants and display properties. You'll learn how to structure products using master variants, options (e.g. size, color), and descriptive properties (e.g. material, origin). By the end, you'll be able to create both simple and configurable products ready to go live in your store.

ecommerce-nilead-platform

Prerequisites

  • A registered and active Nilead account

  • Access to the eCommerce module in your workspace

  • At least one category (taxon) created for your product

  • Inventory/shipping/tax settings configured (optional but recommended)

Walkthrough

Step 1: Navigate to the Ecommerce Product Manager

From your Nilead admin dashboard:

  1. Go to Sales in the left sidebar.

  2. Click on Products.

  3. Click the "Add New" + icon on the top right corner.

Step 2: Fill in Basic Product Information

  • Name: The product title as it will appear on the storefront.

  • Summary (optional): A short blurb shown in listings or cards.

  • Description: Full description with rich text editor.

  • Status: Enable or disable the product.

Step 3: Define the Master Variant

Each product must have a Master Variant. This is either:

  • The only variant for simple products.

  • The base variant for products with multiple options.

Fill in:

  • Price

  • SKU or Barcode

  • Stock quantity

  • Weight and dimensions

  • Product images

💡 Tip: Use high-quality images and a clean naming convention.

Step 4: Define Properties

Properties describe a product without affecting its variants. Ideal for filtering and information display.

Examples:

  • Material: 100% Cotton

  • Style: Casual

  • Origin: Made in Vietnam

  • Care: Machine wash cold

To add:

  1. Navigate to the Properties tab.

  2. Click Add Property, select existing or create new.

  3. Assign a value (e.g., “Organic Cotton”).

  4. Repeat for each attribute.

Properties are searchable and can be made filterable.

Step 5: Add Product Options (if needed)

To sell products in different sizes, colors, etc.:

  1. Click on Add Option (e.g., “Size” or “Color”).

  2. For each option, define the Option Values (e.g., Small, Medium, Large).

Options can be:

  • Filterable in the storefront

  • Sorted manually for display order

  • Featured for merchandising

Step 6: Generate Product Variants

A variant is a specific combination of option values (e.g., Size = M + Color = Red). Each variant can have unique price, stock, SKU, and images.

Once options are set:

  1. Go to the Variants tab.

  2. Use Auto-Generate Variants to create all valid combinations.

  3. Edit each variant individually to customize:

    • Price

    • Stock

    • SKU

    • Images

Only create variants for combinations you actually sell.

Step 7: Assign Categories

Products can belong to multiple Categories (aka taxons).

  • Categories help customers browse your store.

  • Navigate to the Category Assignment section.

  • Select relevant taxons from the tree view.

Step 8: Configure Inventory, Shipping, and Tax

Set strategies per variant:

  • Inventory strategy (track stock or allow unlimited)

  • Shipping category (used to calculate delivery fees)

  • Tax category (used to calculate applicable tax)

These settings apply storewide defaults unless overridden.

Step 9: Final Review and Publish

  • Preview your product using the “Preview” button

  • Click Save & Publish when ready

Your product is now live and visible in your online store.

Sample product structure

Product: T-Shirt
├── Properties
│   ├── Material: "100% Cotton"
│   ├── Care: "Machine wash cold"
│   ├── Style: "Casual"
│   └── Origin: "Made in Vietnam"
├── Master Variant
│   ├── Base Price: $20
│   └── Base Images
├── Options
│   ├── Size
│   │   ├── Small
│   │   ├── Medium
│   │   └── Large
│   └── Color
│       ├── Red
│       ├── Blue
│       └── Black
└── Variants
    ├── Small/Red
    ├── Small/Blue
    ├── Small/Black
    ├── Medium/Red
    ├── Medium/Blue
    ├── Medium/Black
    ├── Large/Red
    ├── Large/Blue
    └── Large/Black

FAQs

1. What’s the difference between options and properties?
Options generate variants (e.g., size/color). Properties describe the product (e.g., material, brand) but don’t affect pricing or stock.

2. Do I need variants for every product?
No. If your product doesn’t have multiple choices (like size or color), just use the master variant.

3. Can I disable individual variants?
Yes, you can disable any child variant without affecting others or the master product.

4. What’s the difference between an Option and a Property?
Options are used to generate variants (e.g., size/color). Properties are informational tags (e.g., material, brand).

5. How do I handle out-of-stock products?
Set the inventory strategy to "track stock" and let the system automatically hide out-of-stock variants.

6. Can I translate products for multi-language stores?
Yes, every field supports translations. Use the locale switcher at the top of the editor.

Discord chat

We're available Monday–Friday, security and critical bug fixes are available 24/7.

Facebook page

Get the latest news and updates regarding Nilead platform and services.